You should have already discussed how you’re shipping your products with your account representative and been provided Method and Carrier Codes that will need to be entered to ensure your products are shipped correctly.
To get started, navigate to WooCommerce -> Settings -> Shipping. The first thing you want to do is add your Shipping Zones. Each shipping zone will represent a location you are shipping too, for example, UK, Europe, Asia, USA, Worldwide.
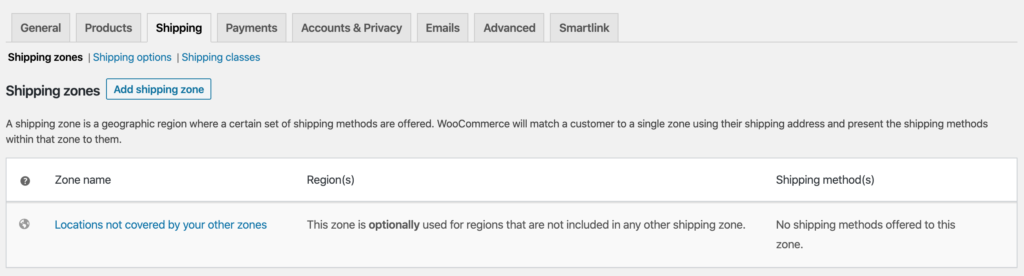
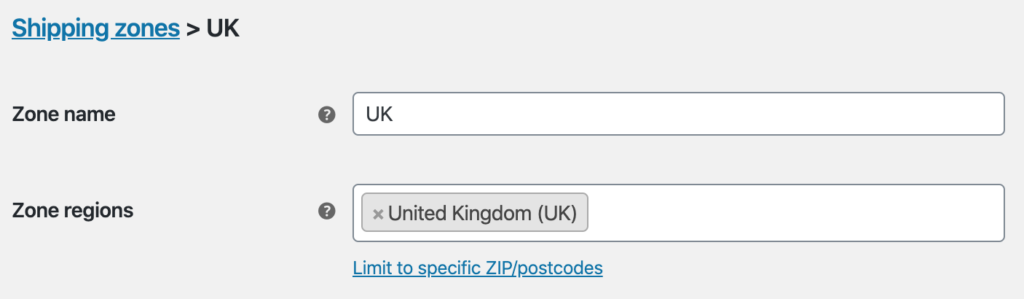
To add your first Shipping Zone click the Add Shipping Zone button towards the top of the page. Give your zone a name in the Zone Name field. Customers will never see this, it’s just for you. Then select the regions you want in the Zone Regions field.
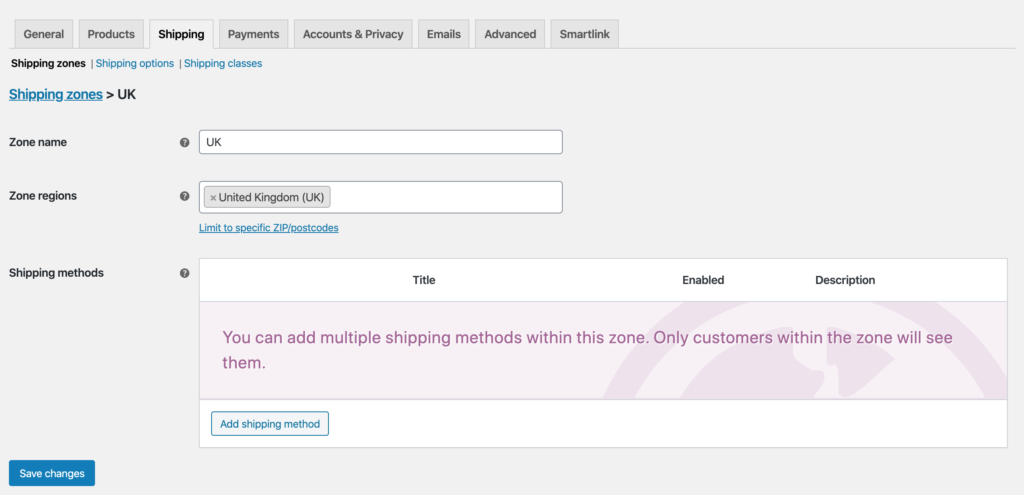
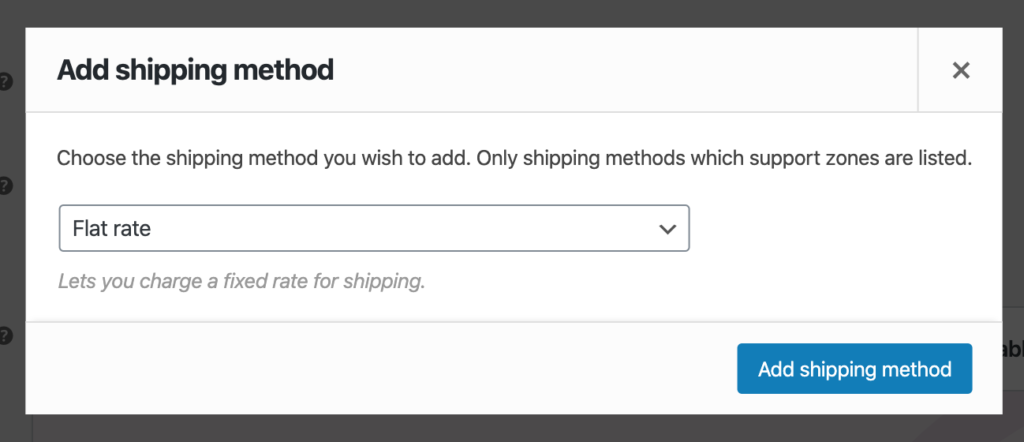
Now you are ready to add your first Shipping Method.
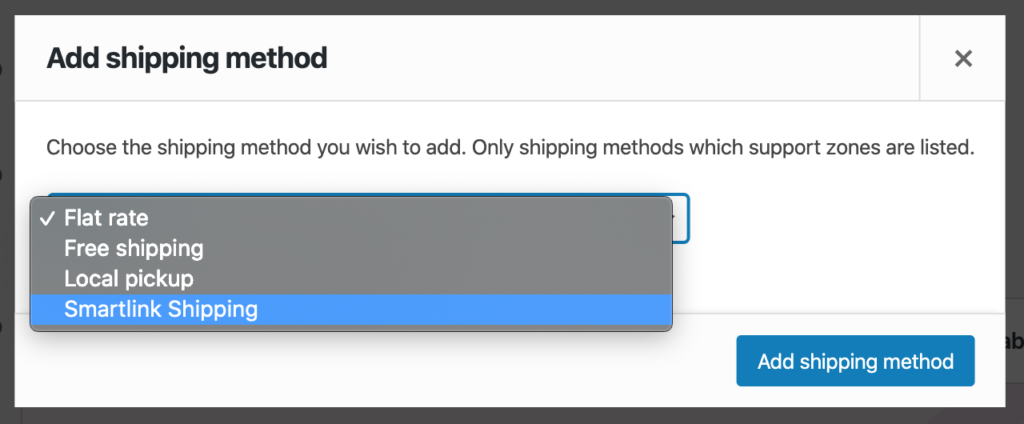
Click Add Shipping Method, this will bring up a pop up with a dropdown with various method options. You should only be using the Smartlink Shipping for now. With Smartlink Shipping selected click Add Shipping Method.
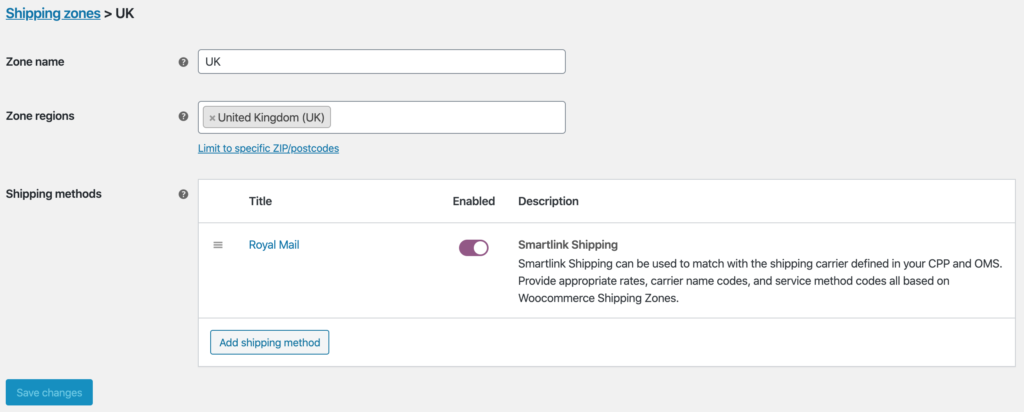
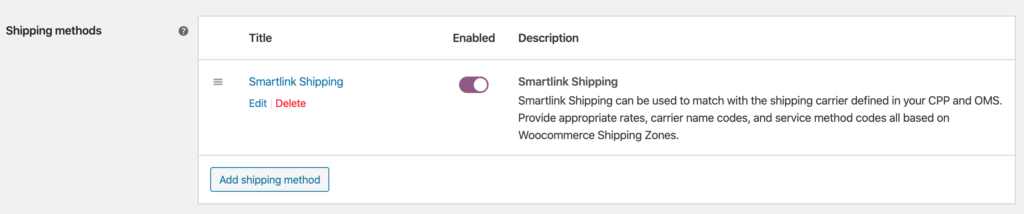
With the Shipping Method added you now want to edit it. Hover over Smartlink Shipping and you should see an option to Edit appear. Click on this.
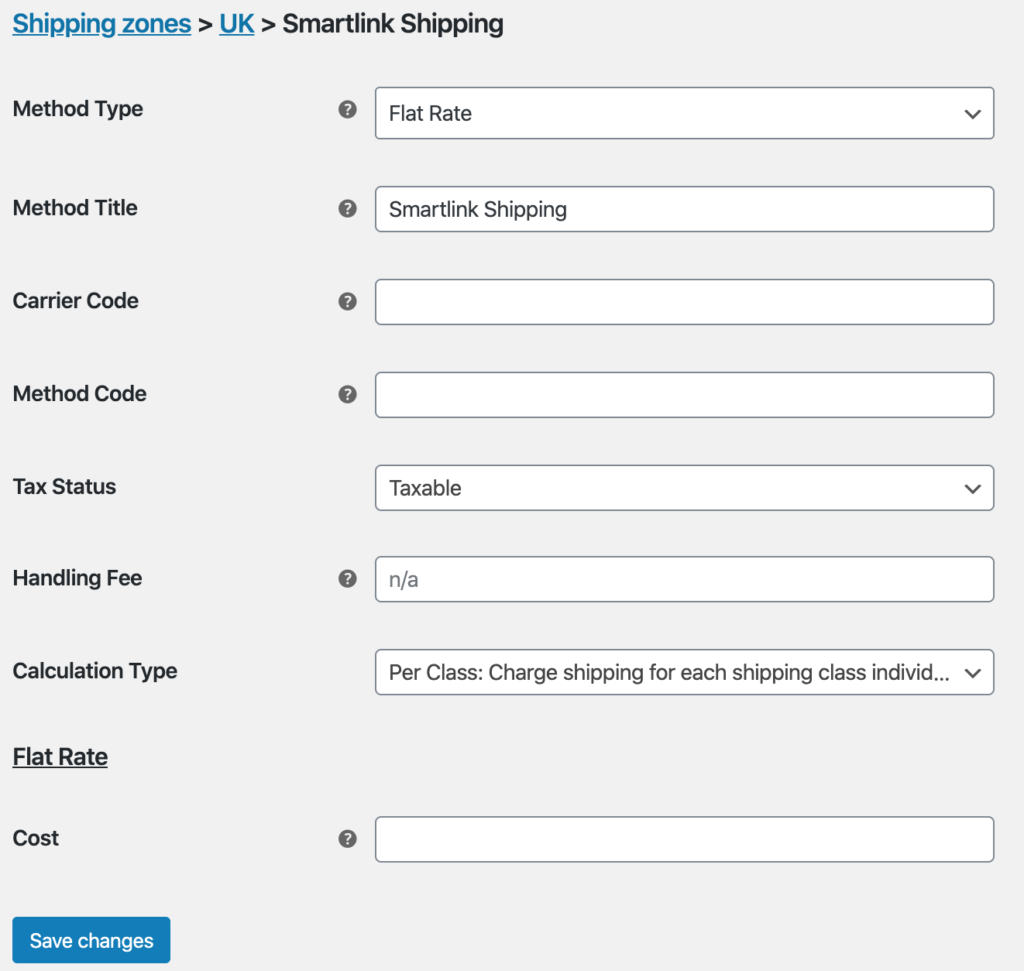
The first choice you’ll need to make is if your shipping requires the Flat Rate method type or Table Rate. Flat Rate is the simplest method, only requiring you to enter one price, Table Rate gives you more flexibility such as minimum/maximum costs that the method will work with, min-max basket quantities, shipping classes and more. In most cases, Flat Rate will be fine, so for the purposes of this guide, we’ll be showing you how to set that up. Please see the WooCommerce guide on how to set up Table Rate Shipping if you wish to use that.
So with Flat Rate selected as your method type, you can now give your method a name. This is what will be displayed to your customer at the cart/checkout stage. Change this by editing the Method Title field which is currently populated with Smartlink Shipping.
Now you need your carrier and method codes that were provided by your account representative. Enter these into the Carrier Code and Method Code fields. It’s extremely important to get these right as without them no shipping information is passed over to your OMS.
You can leave the Tax Status set to Taxable unless you aren’t charging tax on this, but its default state should be fine. You can then also add a Handling Fee if you are going to be charging one. To do this just enter a price in the Handling Fee field.
The last setting before you enter the price is the Calculation Type. You can leave it set to Per Class if you aren’t using shipping classes. If you are then you may want to consider looking at the Per Order option.
Now the bottom of the page beneath the Flat Rate heading you can enter a shipping cost into the Cost field.
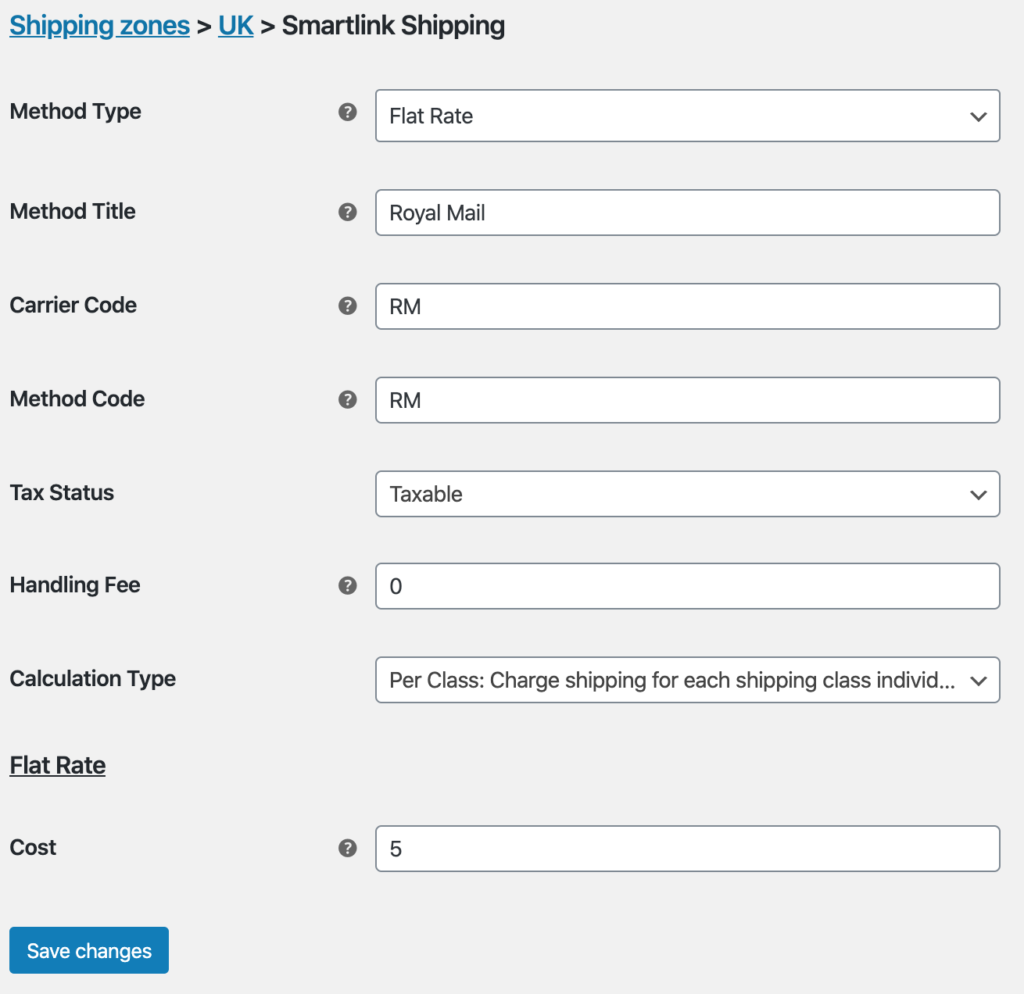
With all the information correctly entered, make sure you click Save Changes. You’ve successfully added your first Shipping Method, go back to the Shipping Zone and you should see your enabled shipping method. Repeat this process for each Shipping Zone you have.